BigDogs 2013 Husqvarna TR650 Terra Build
Updated 6-7-15
About 21,000 Miles On The Bike Now
Latest Info Always Down At The Bottom Of Page
The Video
This is where I will put all my modifications and opinions
of my new Husky purchased 10-19-12.
I bought it at Halls Cycles in Springield, Illinois------super great place---I
bought my 2006 Husky TE610 there years ago.
Be patient----I will fully set it up for adventure touring,
but it will be a slow process as no one has made anything for this bike yet.
But................it's in the works. I know I'll make a lot of stuff myself.
And here is my packing Video.
The nice guys at Halls Cycles took this picture of me and the bike before I took it away.
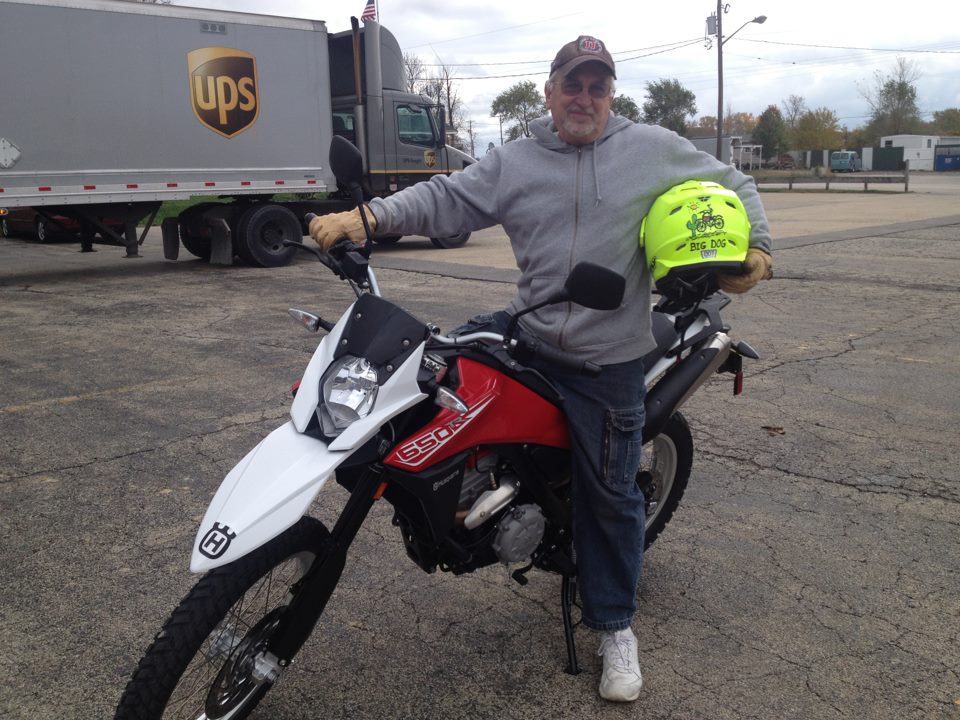
It's not an offroad bike----not a single track bike.
If you have pondered buying one of these to replace your Husky TE610 or 630
you will make a huge mistake.
This bike is not the offroad bike the TE's were---but is much better on easier
terrain and the pavement.
The things that make it not suitable for extreme offroading make it really
good for adventure travel--with some not too extreme dirt thrown in here and
there.
The motor feels like a V-twin and is the smoothest large single cylinder bike
I've ever ridden and it has 58 horsepower----4 times what it take to ride
aroung the world.
It has a 3.7 gallon tank. Even tho the gas tank fill point is in the traditional
place-----the gas tank is under the seat.
There is a large tube going down to the main tank and I thought filling the
tank was going to be a pain with gas splashing all over------not so.
My Wolfman Enduro tankbag fit on here like a glove.
The cool part is the gas cap is flat and I can put it right on top of it giving
me lots of room to move around on the seat
and not be crowded. To fillup I'll simply disconnect the 2 rear plastic snap
connectors and rotate it to the side.
I'm not even getting out of the garage with this thing
till I get a gps on this thing------I'll get lost and won't be able to find
my way back home.
This bike has no crossbar which is where I wanted the gps
mounted.
I had an old set of bent up handlebars off my Yamaha WR250R and cut the cross
bar off of it----straightened it out and welded it on
with my Mig welder. Fatbars are nice but I don't like using them---they soak
up half the heat of your heated grips.
And heated grips will go on when I get to it---got a set layin' around.
All done waiting for paint.
My welder is a Hobart Handler 135 which is 110 volt and
extremely portable.
I run it with Argon gas to make cleaner welds.
Halls gave me a new T-shirt !!!!!!
I'll end up putting anti-seize on nearly every bolt on
the bike before it's over with.
I put some on the handlebar bolts before I put the gps on.
Garmin 276C all mounted up----and I can still see all my
instruments.
I'll wire it in later and post that when I get it done.
Your gonna see all manner of luggage on this thing before
I'm thru.
For day riding and breaking this bad boy in the Wolfman Peak tailbag will
do.
Rear------love those duals instead of the humongous thing
they put on my old Husky TE610.
They tuck in nice and will be no problem for luggage.
I guarantee I'll have wolfman expedition saddle bags on
this thing in a few days.
Wolfman doesn't have one of these bikes yet to make one---so I'll make it
myself cause it's going to be awhile before they can get to it.
On the rear------I'll use this muffler mounting bolt.
On the front-------I'll somehow use this footpeg bracket---there
is already a threaded mount there.
It's probably for their hard bags they are coming out with------I think.
I'm not interested in hard bags.
I did run a power cord also straight from the battery with
a 10amp fuse inline to power my heated jacket and gloves.
I ran it under the seat and poked it out right beside my tankbag.
I'll use it to charge the battery also.
Man that's a big battery in there !!!!
First all day ride in the Shawnee forest of Southern Illinois at the peak of the Fall Colors
.jpg)
.jpg)
.jpg)
.jpg)
.jpg)
.jpg)
.jpg)
.jpg)
Transmission and gearing
Most have said they would gear it down------I definitely
won't be doing that. I rode a fairly technical ATV trail and I wasn't slipping
the clutch hardly at all------and will be traveling on the bike---so I'm gong
to leave the gearing stock------it has perfect ratio's for me.
Not as slick shifting as my 950 or WR250R---those 2 bikes I never use the
cluctch after getting under way. I use the clutch with this
bike usually--just smoother that way.
Motor
Perfect and so smooth------that's about it----fuel injection perfect.
Will pull smoothly from 2,000 RPM in any gear.
Seat
I don't go by miles when rating a seat---------I go by hours in the saddle.
I spent 12 hours on this seat on my first ride------my butt was just fine---I
won't be upgrading the seat as
it doesn't need upgraded for me---but then------my butt just never gets sore---guess
it's got one big ugly calous on it !!!!
Dash Instrumentation
Love everything about it exept the bright high beam indicator bulb------it
will blind you in the night.
It has one mode in which it tells you how much fuel you've used---and it's
spot on.
Speedometer is just 2 mph fast. Pretty good----most bike are much worse.
I think it goes 55mph at 3,500 RPM.
The odometer after 90 miles was spot on with my gps's odometer.
Headlight
Better than most small bikes.
Brakes
Superb
Gas Mileage
First tank---fiddling and idling around a lot----50mpg.
2nd Tank---backroading---first gear ATV trail---highway--a big mix----58MPG
Low fuel light comes on about 168 miles after consuming about 3 gallons of
fuel.
Wolfman Expedition Saddlebags and mounts.
Got the Wolfman Expedition racks made and mounted today.
I took the ones off my 950 and reworked them---took me about 6 hours.
The finished product
I've got a black set of these bags---I think I'll put them on there and keep the yellow ones on my WR250R.
Rear shot of both bags.
.jpg)
.jpg)
Watching Ohio River barges in Rosiclare, Illinois
.jpg)
Bill Hill Hollow Road----Southern Illinois.
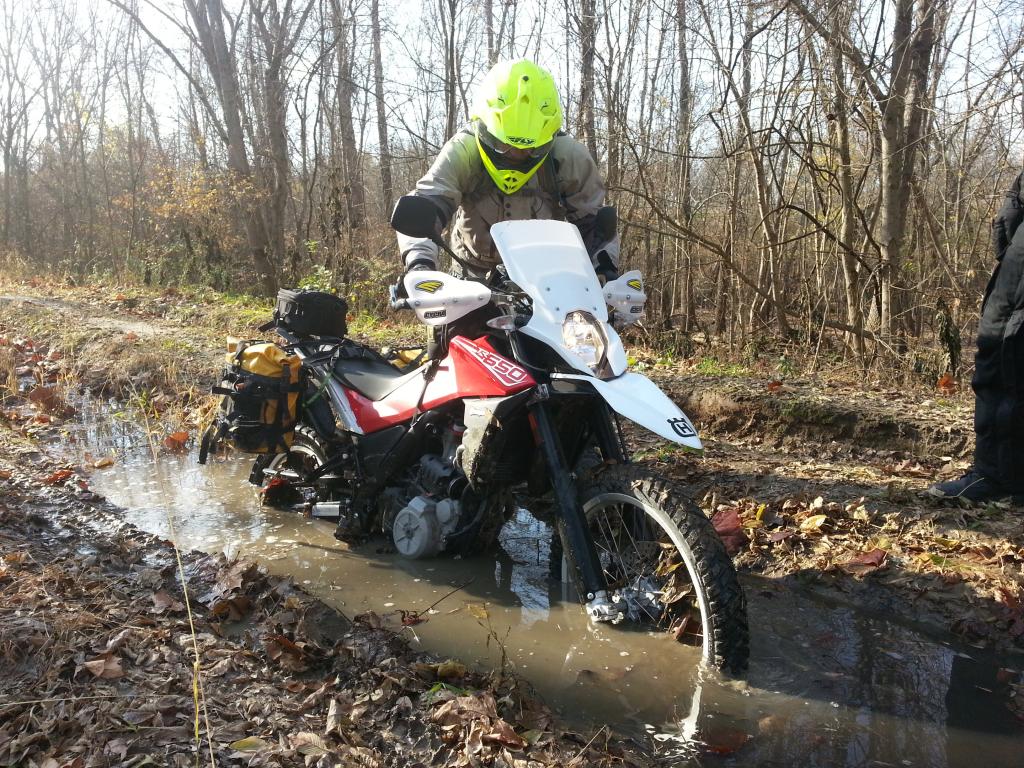
This was way deeper than I thought----it was almost over the wheels and I
wondered if it would keep running----and it did.
.jpg)
OK----now I want a little windshield.
No telling when Huky will make me one---but they say one is coming.
So---you see the original which is no bigger than the headllight shroud.
And you see that $5 wastebasket behind it-------HHHhhhMMMmmmm.. ????????........
.jpg)
$5 at the Dollar Store---where are good Adventure gear can be bought.
.jpg)
11-6-12
So I removed the stock little thingy and cut me up a little
windshield out of one side of the waste basket and was satisfied------or so
I thought.
I'ts pretty flimsy and didn't bend back at all at 80mph which really surprised
me.
But maybe it should be a bit bigger------I didn't make it bigger the first
time because I never even thought this would work at speed.
I just knew it would bend back at speed------no so.
.jpg)
Cockpit view
.jpg)
.jpg)
So------I made a bigger one and mounted it over the previous
one for strength.
This ain't gonna work----it's too flimsy------or so I thought.
.jpg)
70 mph and it was fine-----it never bent back at all.
I never ride over 70 mph------high speeds bore me to tears.
Since I've gotten older I don't worry about what stuff looks like anymore---and
decided I like this fine.
It didn't seem to matter that I couldn't see thru it as it was well below
my site of vision.
I may or may not buy Husky's windshield when it comes out-----then
again this one may not last one day---we'll see.
I have the optioin of taking the bigger part off and leaving the smaller if
I want to.
Let's see how this holds up.
It took me about and hour to do this---I used tin snips to cut the plastic------it
was very easy.
.jpg)
.jpg)
Here's what's left of the wastebacket--and you can see
the original windshield----huge difference in size.
And this took quite a bit of the wind off my body----did nothing for my helmet
as expected.
.jpg)
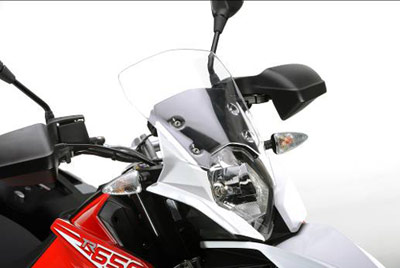
Here's a picture of Husky's bigger windshield.
Cycra Pro-Bend Handguards
It seems to always take a little bending of the thick aluminum to make them
fit---but I always get it done.
It helps to heat the aluminum a bit-----not too hot---when bending.
I had to cut the ball end of the clutch and brake levers off to make it all
work.
.jpg)
.jpg)
You have the option to attach these to the handlebars---------I
never do that.
There's just not much room there sometimes and this is so much better.
When you order these you have to decide which mount to order---this is the
side triple tree mount.
Some bikes would mount to the front of the triple tree---and then you have
the handlebar option and you'll need to
specify the diameter of your bars when ordering.
I had to use longer bolts to attach this to the triple tree as these side
mounts are very thick.
.jpg)
You can see my "Hot Grip" brand heated grips
in other pictures above---but here is the knob that operates the variable
heat controller
for my heated grips-----it also turns them off. I neatly tucked the controller
inside the headlight shell. I tapped into the wire
going to the horn for powering both the heated grips and my gps. This wire
is only hot when the ignition is on so it won't run my
battery down if I leave the grips on. There are plenty of spare amps on this
circuit.
Here's where I got my power from------take the headlight
out------not easy.
Find the wiring harness coming from the switches on the left side of the handlebars
(horn, turn signal, high low beam).
The one harness has 2 plugs---------work with the bigger one---ignore the
smaller one.
I tied power into the middle wire on the bigger plug (it feeds the horn)--------don't
remember the color.
You can get fancy and get one of those power distribution
thingy's but the bottom line is you will have spent way more
money and have lots more time in this. Also the wires will probably be coming
from under the seat and you will have wires going to the
handlebars that have to bend everytime you turn the handlebars. With my method
you eliminate all that.
This works--------don't overthink it and make it more complicated than it
needs to be.
.jpg)
The whole Enchilada !!!!!
.jpg)
Fell in a mudhole
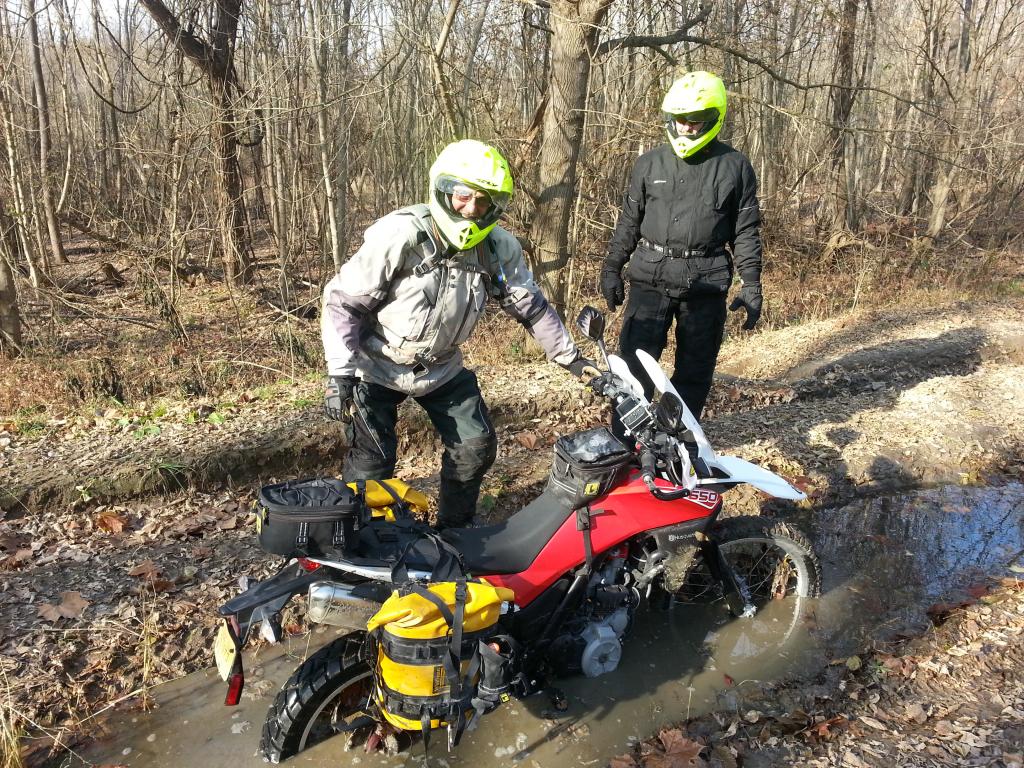
Ok enough fun in the mudhole !!!!
Kickstand Fix
And Kickstand Switch Removal
The kickstand on these things can come up very easy-----say when you stop
and put it down---it may come right back up and when
you lean the bike over--------------over you go and you have to pick the bike
up and hope you aren't hurt and the bike isn't hurt.
I almost did this a hundred times and was fed up with that----and worried
I'd break my leg one of these days.
So---out comes the cut-off wheel, grinder and welder.
I took the 2 big bolts out that hold the whole kickstand on so I could do
the work on my workbench---I
has to unplug the kickstand switch to do this also--there is a plug right
on the switch.
The problem is the upper point where the kickstand spring is attached. It's
too far to the rear of the bike.
It needs moved about 5/8" toward the front of the bike.
You can see where I cut off the pin off and have relocated
it---ready for welding.
That pin actually goes all the way thru the plate and sticks out the other
side and works with the sidestand switch.
So----I cut most of the weld out----drove the pin most of the way thru from
the back out the front leaving a little of it in there
and cut it off. Then Drilled a 5/16" hole 5/8" from the old location
about 1/4" deep and drove the pin into it.
It's ready to weld.
Welded up and ready for painting.
You can plainly see the old location.
I just guessed how far to move it and hoped I was right-----I moved it 5/8" and I guessed right.
The finished product---you can see the spring is much farther
over center than it was.
It snaps firmly and quickly in place when I put it down now and it stays there.
Now----the switch removal---I remove all the kickstand
switches off all my bikes.
Disclaimer---------don't do this---only for idiots like me.
Somewhere down the trail they will all fail----and there you are---can't start
your bike.
I've done removed the switch--and now what you need to do is cut the 3 wires
that went to the switch --cut
them about 3" from the plug. Solder the yellow/green and Brown/Green
together.
You don't need to do anything to the blue wire-----do not connect it.
I put heat shrink tube on the end and wired tied all this to brake line on
top of the swingarm.
Your done.
Now your ready to go out and break your leg when you leave
the kickstand down and go into the first high speed left hander.
But at least you won't break it in the McDonalds parking lot in front of everybody.
Be careful----you bike motor will turn over when you hit the starter button
even tho your kickstand is down.
Disclaimer----------don't do this.
5 Day camping trip to Missouri
11/5 thru 11/20 of November
My first real trip on the bike---I just rode easy dirt and rock roads over
in Missouri looking for springs, grist
Mills, bridges and such. It performed flawlessly and I ran my heated grips
all day long each day with the heated vest
on a lot. It was no problem for the bike. Starts in freezing weather were
no problem.
And I found some neat stuff.
A pretty sunset
.jpg)
It's gettin dark-------better get to camp.
.jpg)
Noblett Lake and Dam
In 2011 vandals opened a valve and drained this lake completely---they were
never found.
.jpg)
So now the valve is locked
.jpg)
Rocky Falls
.jpg)
Klepzig Mill
Built in the early 1900's the mill powered a sawmill and even a generator
to provide electricity to a few local farmers.
N37° 07.592'
W91° 11.927'
.jpg)
Here you can see the waterway that was built to divert the water from Rocky Creek into the Mill.
.jpg)
The road to and from the Mill was littered with little fun creek crossings.
.jpg)
I found a lot of old bridges on this ride------but this
one struck me as very unique.
Half of the top was concrete and half wood-------I've never seen that before
in a bridge.
.jpg)
Pebble Dam Lodge------Lots of history here.
Electricity for this very old lodge was originally provided by a hydro electric
generator on the North Prong Jacks Fork river
just below the lodge.
.jpg)
I had been riding in a very cold rain for hours and was
in a restaurant drinking coffee and met this young man
whose passion was these old motorcycles. We became immediate friends and he
asked me if I had time to come and look at his treasures.
I couldn't refuse----Very nice guy whose whole family rode motorcycles. He
had Hodakas, Bultaco, Yamahas, Hondas, BSA's
all kinds of old stuff--nothing new.
.jpg)
The Road Less Traveled
.jpg)
OEM Skidplate Installation
Not really happy with it.
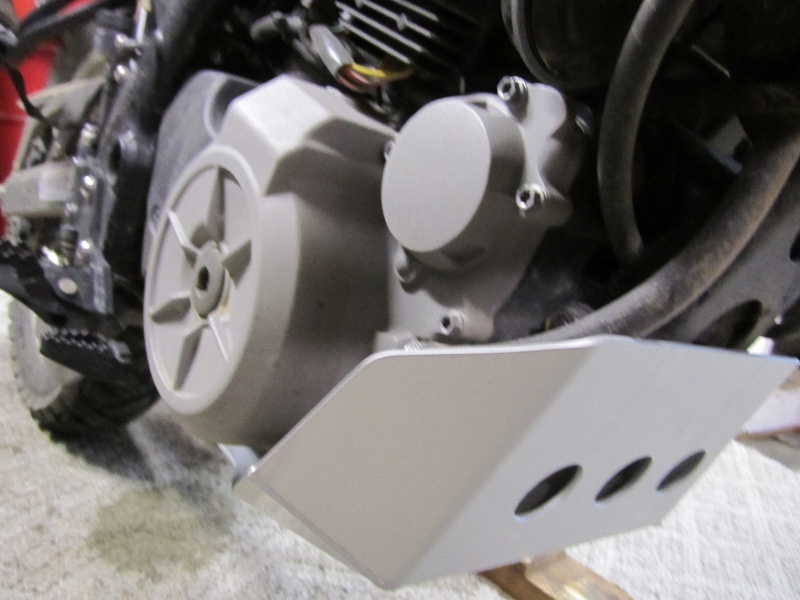
The front of it fastens real nice and solid on an engine mount bolt.
.jpg)
The drain plug and oil line banjo bolt are still kind of
exposed.
Especially the drain plug which extends below the skidplate----not really
good.
This is really stupid---a skidplate is suppose to protect these things.
.jpg)
At the rear of the Husky OEM skidplate it gets worse----it's
not even fastened at the rear----2 tangs sit on top of the tubular frame
and this all can be pushed up easily. So when the bike bottoms out the plate
can be pushed up easily it looks like to me.
Also--they sent 2 rubber pads with adhesive to be put on the taps-----they
fell off as soon as I put them on and I had to
wire tie them on to keep them in place-------pretty cheezy.
.jpg)
Skidplate Update 12-12-12
Or---the $1,358.00 Skidplate
I decided not to use the OEM Husky plate and received the
Motosportz Skidplate
Both side beside.
It would be hard for me to believe someone could make a beefier skidplated
to protect the bottom of the motor than the Motosportz one.
It is 1/4" thick---I've never seen one that thick---strongest thing I've
ever seen----but it does not obviously cover anything else.
It does however hang down far enough to protect the brake lever----that is
really good !!!
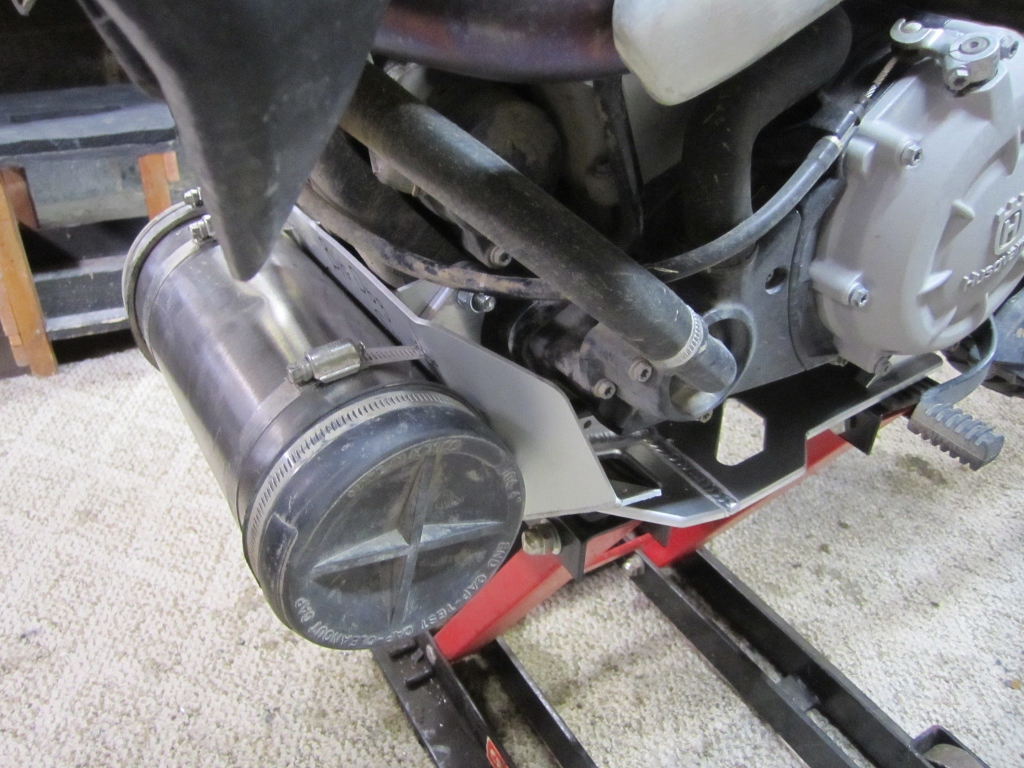
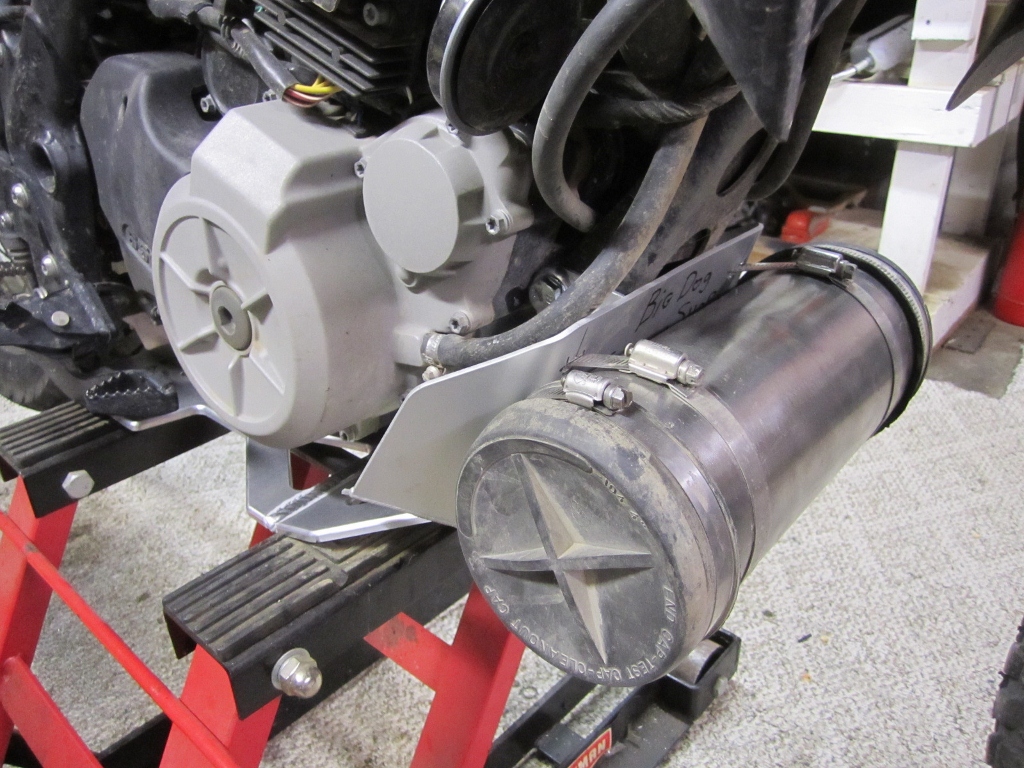
So my feeble brain got to turning----could I combine the 2.
The finished product--now I can put my bike on a stand.
Yes---I wacked up the OEM one and bolted it to the top motor mount bolt and
am totally happy with my finished product.
Parts with Labor (mine)-----and engineering fees (mine)
$1,358.00
And at this very moment in time was the only choice for me.
With Stainless Steel Tool Tube-----$1,754.32
What a bargain
When all was said and done------I am so happy with what
I've done.
Booster Plug Installation
The booster plug is now officially available
for the Husqvarna on their website.
HERE
The more I rode the bike the more I noticed the lean running
of the motor. It seemes so lean at idle it almost seems to miss.
And occasionally when you open the throttle even a little it will cough and
die.
This could be dangerous in the middle of an intersection in traffic.
A lot of BMW's have solved this problem with the "Booster Plug".
I got one and it works. Booster Plug claims this is a way better solution
to this problem than computer modules and
they explain this thoroughly on their website.
.jpg)
I've got my finger stuck in a hole in the bottom of the
air box where the OEM air temperature sensor goes.
This feeds air temperature info to the fuel injection module.
.jpg)
This is looking up under the bottom of the airbox at the
connector to the temperature sensor.
You plug the "Booster Plug" module into here and then the outlet
to the module into the wiring harness and it fools the fuel injection
into thinking the ambient air temperature is cooler than it actually is---and
this makes the fuel injection run a little richer.
.jpg)
This is the actual OEM air temperture sensor-----which
says "BMW" on the side of it.
You keep this---I just pulled it out to look at it.
I was taking OHM reading with the sensor at different ambient temperatures
for testing purpose for Booster Plug.
.jpg)
Hard to explain all of this but here it is after I was
done with the installation.
It was easy peasy----and took me about an hour.
The kit comes with another air temperature sensor and I mounted it inside
the airbox in the bottom where it says "Booster".
It has to sense ambient temperatures so this is the best place for it so it
doesn't pick up radiant heat off the bike.
You can mount it elsewhere----some on the BMW's run it up the frame to the
front of the bike some where.
On this bike---there are 3 reasons I chose not to do that.
1. Putting it in the airbox is easier.
2. It's a much shorter route to the airbox and you don't have the sensor wire
running very far where it might get pinched or chafed.
3. It's a better place--no way it will pick up radiant heat.
So now---the bike runs about 6% richer.
.jpg)
This is what yo get.
This all simply plugs in series with the OEM sensor.
I am the first person to try one of these on the Husky----I had talked to
the Booster Plug people on e-mails and they never heard of the Husky
but we both figured their modules would work for this bike as it's the same
engine as the BMW.
I had to take some OHM meter readings of the OEM sensor for them to see if
it would work and they sent me one to try.
It works.
It idles better and smoother---much stronger running throughout and it never
dies or stumbles now.
Some who have put these on BMW's have claimed better gas mileage--that doesn't
really make sense--------so I'll see about that later on.
I think about $150 from Booster Plug---I got it free as I was their test patient.
.jpg)
High Powered LED Light Install
12-23-12
I'm not dodging those deer in the dark anymore----stock headlight is OK-------I
want more---don't we all !!!!
The finished Install------Awesome !!!
These are the Black Model 60 offroad flood lights
Available for $100 a piece
HERE
I mounted them to the Cycra Pro-bend handguards. The higher
you mount these the better you'll be able to see.
I've seen lot's of guy mount them down low to the fork tubes----I don't like
that install.
As an added benefit the wiring is much easier.
I also purchase the LED rotary dimmer switch.
With this item you can have the extremely bright and illegal LED's set to
an infinitely adjustable lower level when on low beam.
With this---you connect a wire from this module to your high beam wire---now
when you hit high beam the LED's go from the low setting you had them
on----- to full bright--this module also has an off detent if you want them
off while on low beam.
I velcro'd the module to the location you see and this made it easy to access
wiring behind the headlight.
Without a bunch of blah, blah, blah, blah about lumens
and density of light rays and a bunch of other technical bull let
me just say they make daylight out of dark. I've got this same setup on my
KLR.
These are illegal to use------if you turn these on in the dark you will completely
blind oncoming traffic and risk the other
vehicle crashing----maybe hitting you in the process.
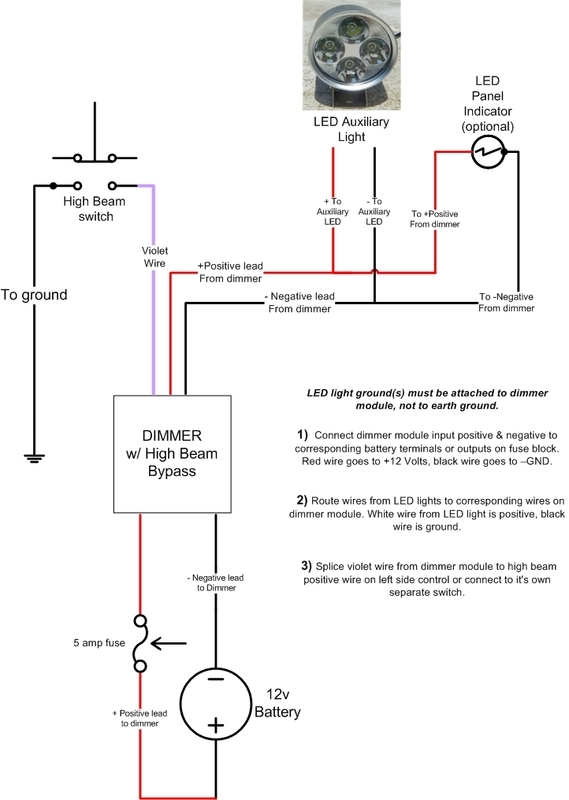
This is the wiring diagram I got--------I did not wire
it like this exactly.
I got my power from the power to my horn behind the headlight.
The wire going to the high beam switch in this diagram confuses me-----there
is no ground wire on a headlight switch ????
I did not use the optional LED panel indicator either-------seeing the power
of the sun in front of you will surely
tell you these are on.
For Day trips I've been using the Wolfman "Peak"
tailbag.
This is the Wolfman "Wolftail" bag---about $140 I think.
A lot bigger than the Peak with three outside compartments. The bag is expandable
and I ordered the
extra rainfly for it---although I've found his bags are pretty waterproof
without it.
I will use this same bag for day rides on my WR250R, KTM 950 and KLR.
The rear fender and license
plate are really hanging down and flopped around a lot on rough terrain.
Kind of seems it might break off eventually. So I completely removed this
metal bracket which is much heavier than it looks.
I just drilled some holes above the old mounting as high
as I could and fastened with wire ties.
They will hold till the cows come home.
2-22-13
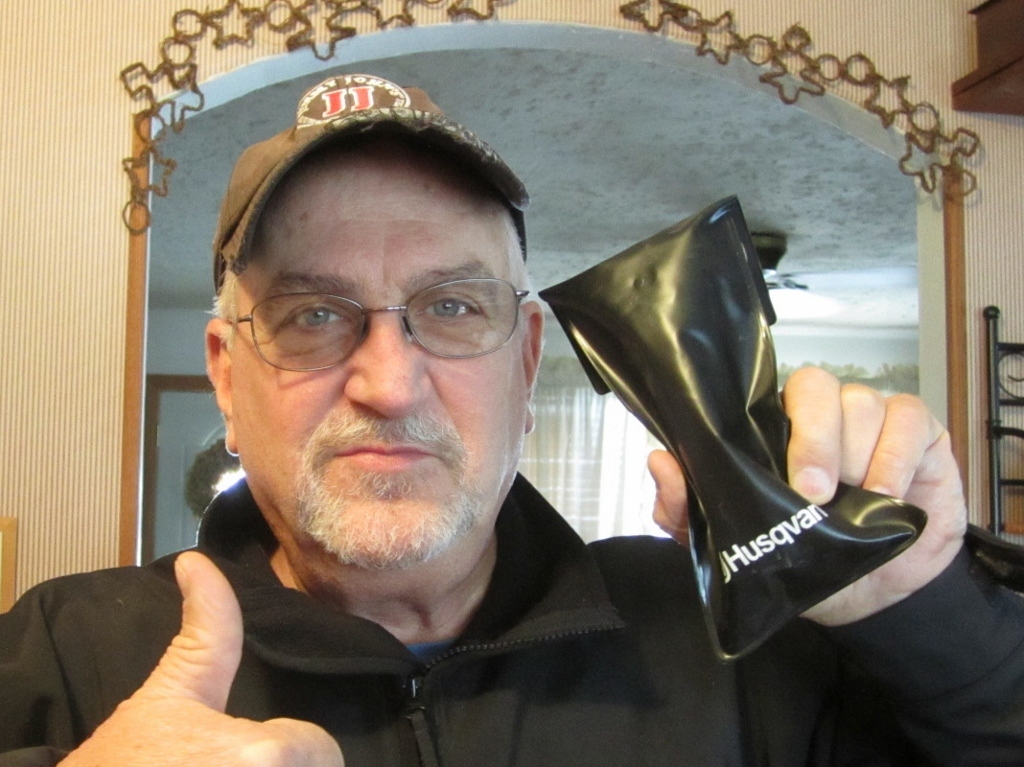
My bike came with no toolkit which I mentioned to the dealer
when I picked it up.
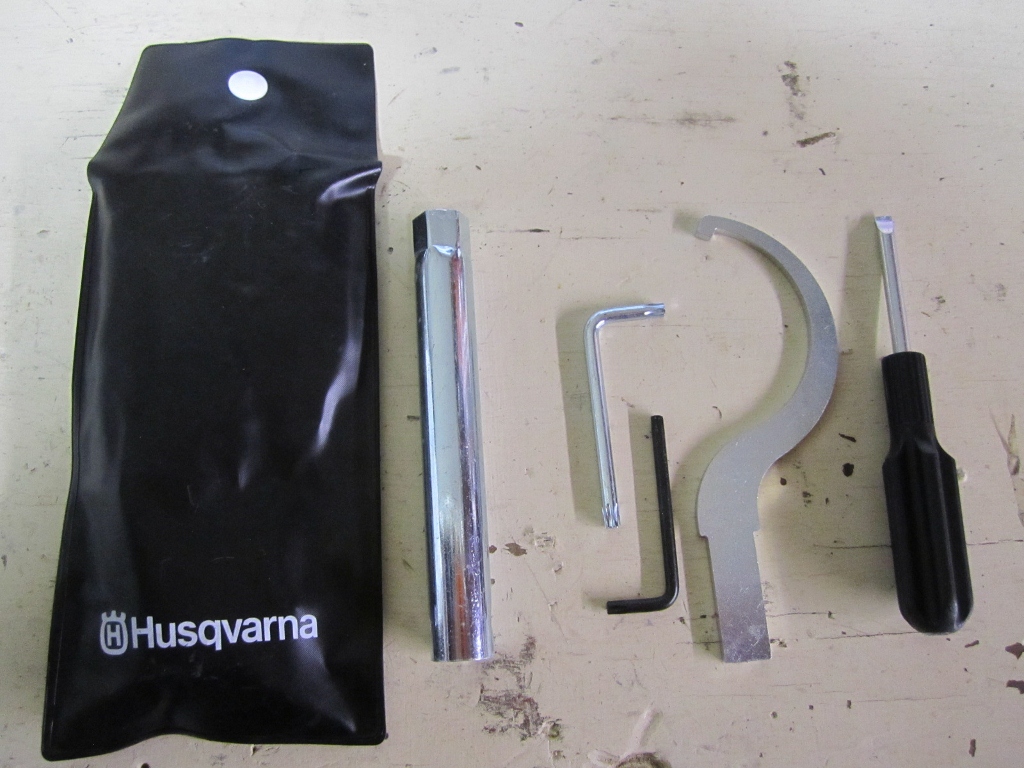
Months after the sale some people started to get the toolkit---which has at
least one very important thing in it that you will need.
A sparkplug wrench------very weird long one-----you'll need it to get the
sparkplugs out.
One call to my dealer and I had one 3 days later.
What's Inside------those aren't allen wrenches---they are 4 different sized torx wrench's.
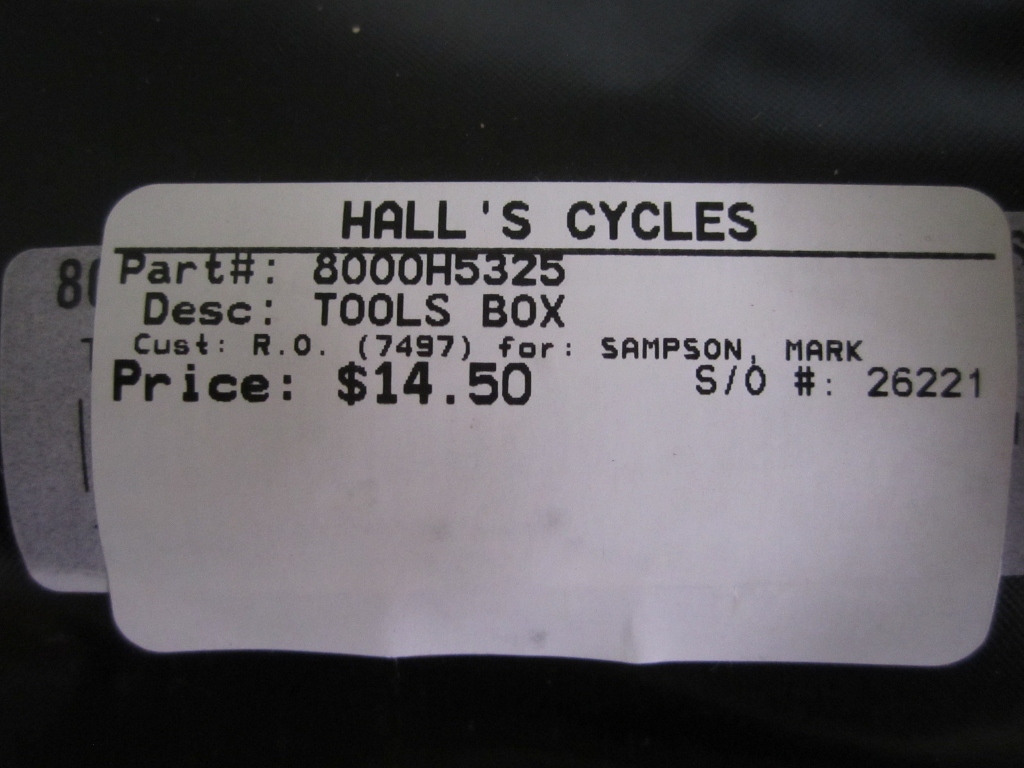
They didn't bill me for it----but it's plainly got my name on it with a price of $14.50
4-1-13
I'm thinking I got about 3,800 mile on it and decided to
put some new tires on the Terra.
Stock tires broke down with my bare hands--------very easy to get off.
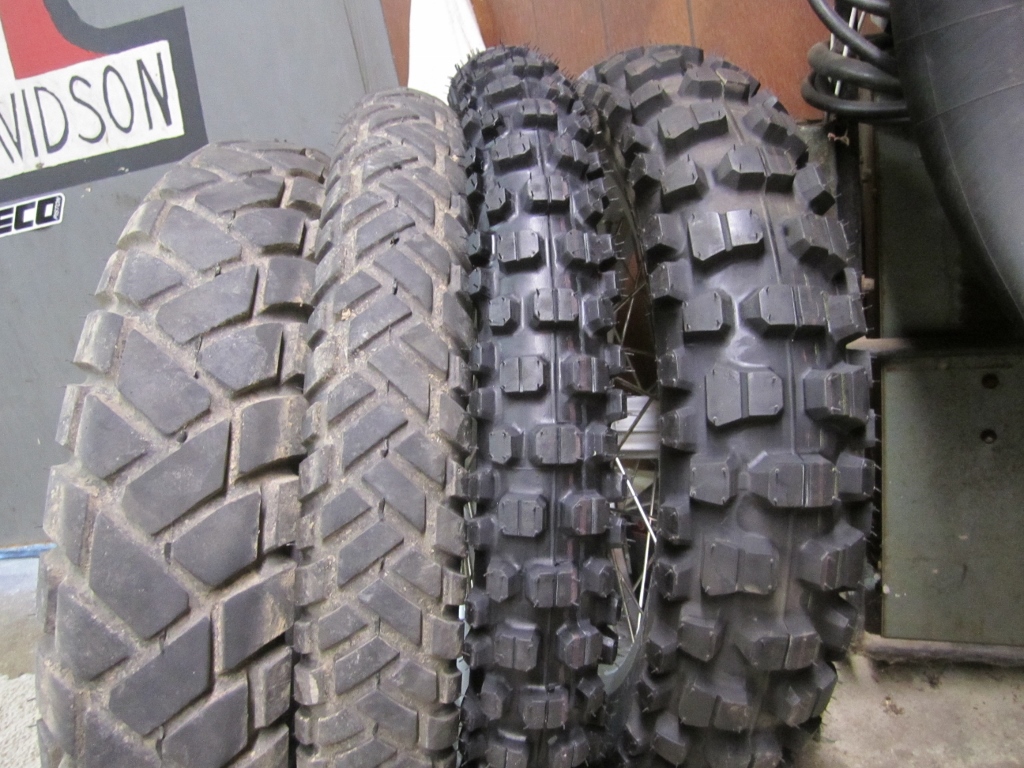
I wanted something more aggressive and had the money for the tires I wanted
to put on it---------a TKC 80 on the front and a Heidenau on the rear.
So why did I put on 2 Pirelli MT-21's you ask ???????????
Cause they were free that's why----my son gave them to me when he quit riding---and
guess what ??? I got 2 more---Awesome !!!!
He bought them for his TE610 that he sold.
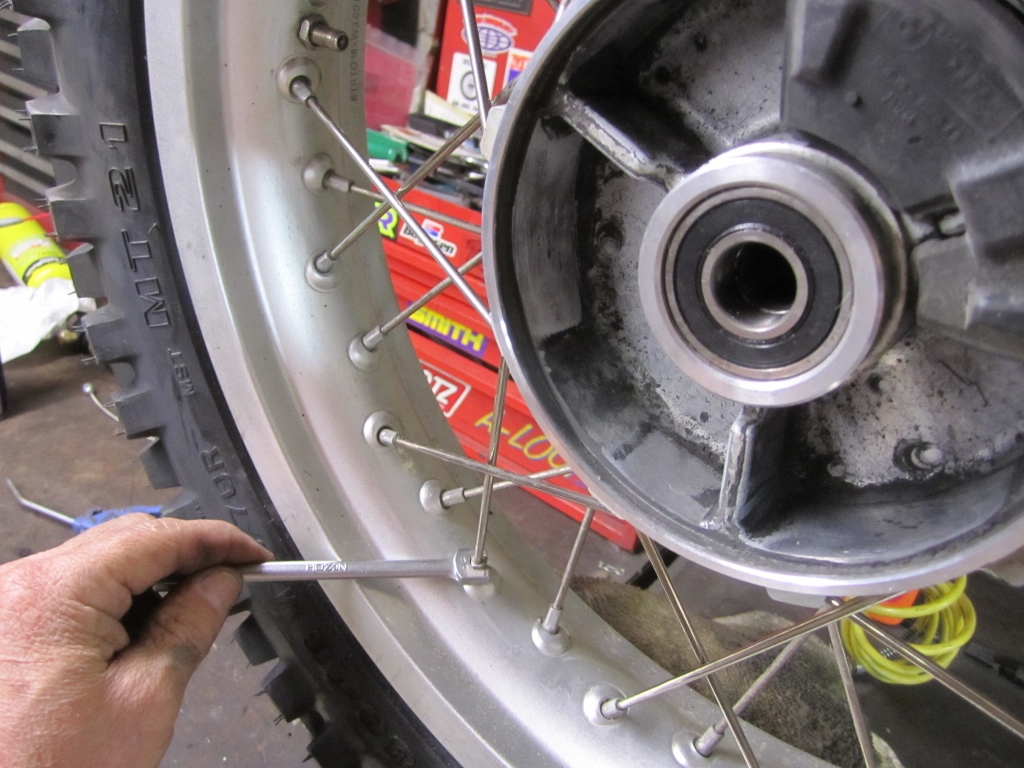
Some other very important things I do when putting on a
new tire at home-------check the wheels bearings and spoke tension.
Checking the spoke tension at this mileage is very important---later on not
so much after they have settled in.
Also----take note that yes the real wheel has a cush hub.
The little bearing you see on the sprocket side looks pretty tiny---but fear
not there is another in the sprocket hub--it's much bigger.
The KLR has the same set up.
How much torque did I put on the spokes you ask ???? An experienced old man's
seat of the pants feel--that's how much.
I put about an 1/8 of a turn on each spoke----felt just right.
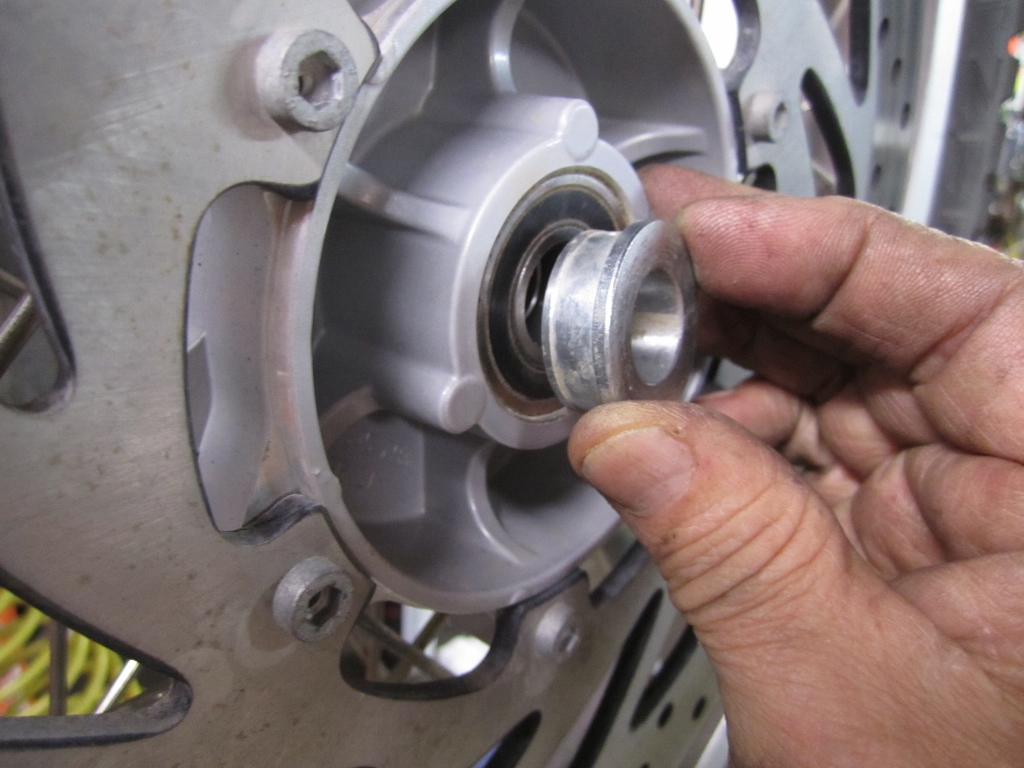
This is the front wheel---a bearing---and the spacer on
the disk side.
I thought this really weird------there is no seal protecting the bearing---I'm
not sure I've ever seen this ??
Yes the bearing is sealed---but there is always a seal on the outside of it
????
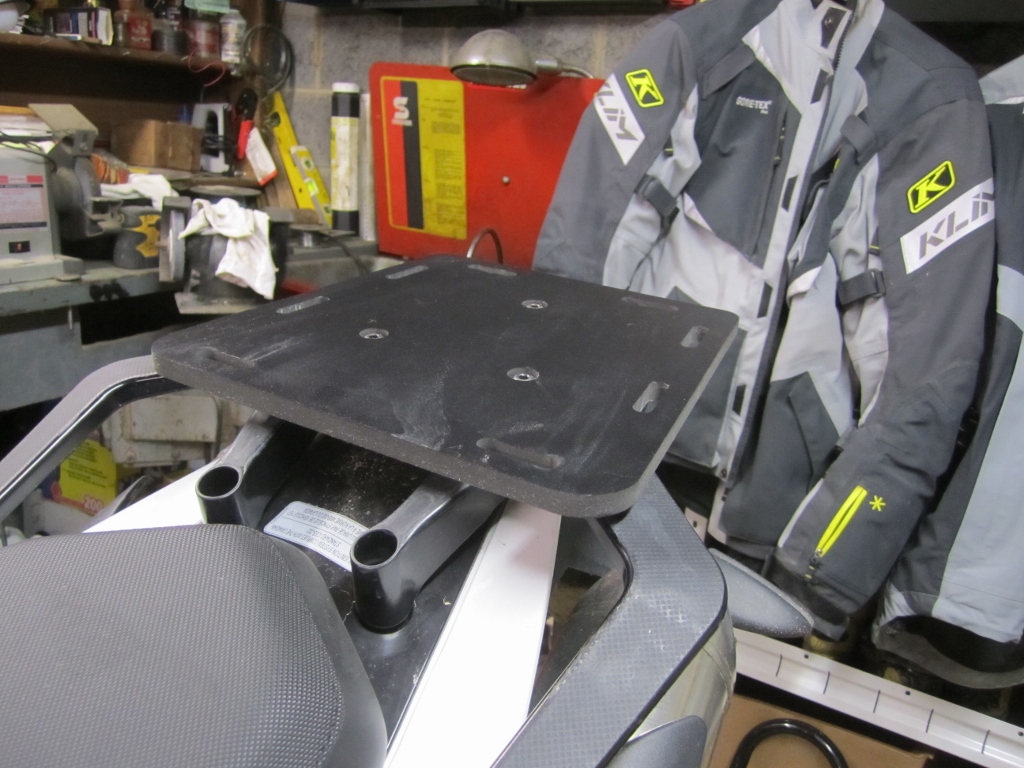
And my good buddy Scott Willimason (High Five) on AdvRider
give me this nice rear plastic rack to mount over my stock rack.
Lot's more platform to mount a dry bag--------really nice---and it was free
!!!!!
Update 5-30-13
I packed up for camping and went down into Kentucky, Tennesee
and Mississip and went on a ride that Sam Correro
(creator of the Trans America Trail) put on. He is pictured on the right.
Bike did great with the new tires I just put on it.
I wish I got a picture of it all packed down as I've figured out the ultimate
way to pack on it.
I'm still lovin' my wastebasket windshield.
%20(1024x628).jpg)
I rode the Natchez trace parkway a bit and even went to
Tupelo Mississippi and visited the little house
Elvis Presley was born in and lived in for a while.
%20(1024x768).jpg)
About 6,000 miles on the bike.
7-29-13
8,070 Miles
I replaced both tires again---this is my
2nd set of tires at 8,070 miles. Originals were wore out at 4,000.
On the rear I went with a Dunlop 140/18 Rally Raid----I had this left over
from when I sold my 950 KTM.
You can see the wore out Pirelli MT-21 in the picture below with 4,070 miles
on it.
I think the Rally Raid will last longer.
Not mounted in this picture yet is a Continental TKC80 which I think I will like a lot better than the Pirelli MT-21 that you see that is wore out.
Then I updated the info on the inside of my handguards as I always do on all my bikes.
Chain Alert !!!!!
At 8,070 miles I found the chain had cracked and missing
O-rings. What a cheap chain which had not been neglected.
The sprockets still looked like new and I did not replace them.
Rear Fender Support
Some peoples rear fenders have been breaking off.
I made 2 brackets---one on each side to support the floppy
rear fender---here is the finished product.
I can't believe how stout it made the rear fender-----with just one bracket
fastened up when I tried to shake the
rear fender it shook the whole bike------that fender won't flex any now.
First I mig welded a bracket to my Wolfman pannier racks.
Then I made this rod-----I wanted the rod to be a bolt
on item and not welded to the bike anywhere in case you
needed to remove the fender or saddlebag racks. I took a solid piece of round
steel about 3/8" in diameter and heated up the ends
with an oxycetylene torch red hot and pounded the ends flat with a hammer.
While doing so I bent one end at an angle
to fit to the bolt on the turn signal. Then drilled a hole in each end.
I bolted it all up and I was done.
I think I'll send a bill to Husky for 1.2 million dollars.
Or should I send it to BMW-------yeh---that's what I'll do.
Water In Swingarm
I drilled a hole in the bottom rear of my swingarm after
hearing some were getting water in their swingarm thu the
fasteners on top of the swingarm that fasten the mud flap.
Sure enough --------a lot of water came out. You don't want that to freeze
in there---it will bust the swingarm if it's full.
So---the next time I pull the rear wheel I'll address the point where the
water is getting in and seal it up.
Oil Tank Drain Fix
Tired of draining the oil tank and fooling with that stupid
allen headed drain plug ?????
Well get a cup of coffee and listen up.
I will show you how I re-routed the drain and installed
a valve in it to make draining the oil tank easy, simple and no mess.
First drain the oil tank if you want--------I didn't. I pinched the line off
on the left side of the tee.
This will keep the oil tank from draining-----you will only get a residual
amount of oil from the line on the right going to the oil pump.
Remember on this installation---there is no pressure on this line-----ever--not
even running.
.jpg)
If you've got the oil line pinched off good---this all the oil that you'll get.
.jpg)
I thought and thought---and measured and measured as to
what type of tee I would install so I could run a line down
with a drain valve on the end of it.
.jpg)
After finding tees at Lowes and the auto parts----some
brass---some galvanized I decided they would work probably but
all of them choked the line down a bit-----I didn't want to risk starving
the oil pump---but better yet I figured a way to use the stock tee.
Guess what ???? What you say-------------the female thread
on the side of the tee has the same pitch and size as an ordinary 1/8"
plumbing fitting.
So I thread a short 1/8" nipple into the tee and used teflong tape and
teflon pipe dope to seal it.
My profession was a plumber and pipefitter so when I say
this is an 1/8" nipple it is----we go by the inside diameter.
If you go to wal-mart or Lowes and ask for an 1/8" nipple there is no
telling what you'll get.
The outside of an 1/8" nipple is about 3/8" ---and so I used a rubber
drain hose with a 3/8" inside diameter
.jpg)
Pipe threads are tapered---but I thing the thread in the
side of that tee is straight-------no problem as
this is not holding 3,000 lbs. of steam pressure on a boiler off a nuclear
reactor.
Here is what I bought at the auto parts. 1-----1/8"X
2" brass nipple----you can use galvenized or black that would be fine.
I-----1/8" drain valve, some hose clamps and one foot of 3/8" diameter
fuel hose.
I already had the 1/8" chrome nipple you see I screwed into the stock
tee.
.jpg)
Here's what it looks like at the Tee when I was finished.
.jpg)
And the finished product----I fastened the line to the plastic shroud with zip-ties.
.jpg)
The whole thing is a good 2" inside the plastic shroud
so no worries about it getting caught on something.
If it did------you have more worries cause you would have tore the radiator
off in the process and will be screaming because of the 240° water on
your leg.
.jpg)
So what did I do with the stupid plug that was in the OEM
tee ?????
I really wanted to toss that troublesome thing---but stuck it in the bottom
of the valve in case the valve handle got bumped.
No now draining the tank will be quick and easy and you won't get your hands all oily.
I did this same thing 2 years ago to my riding lawn mower---when you pulled the drain plug oil ran everywhere---all over the place and took an hour to clean it up.
.jpg)
Madstad Windshield
12-5-13
Mine is the 20" dark gray shield model and was about
$280 from HERE
My old buddy Hi Five (Scott Williamson) put one of these on his bike and really
liked it. And as I've said before this isn't my dirt bike----so
a bigger windshield would be a benefit I thought and off came the wastebasket
windshield I worked so hard on.
Crap---my bike will look like everybody elses's now !!!!!
As soon as I ordered the thing and clicked "Buy"---I
knew I made a mistake.
I forgot my high power LED lites were in the way---------too late now.
So here comes the UPS lady and my doggy JoJo isn't happy----but
I am !!!!!
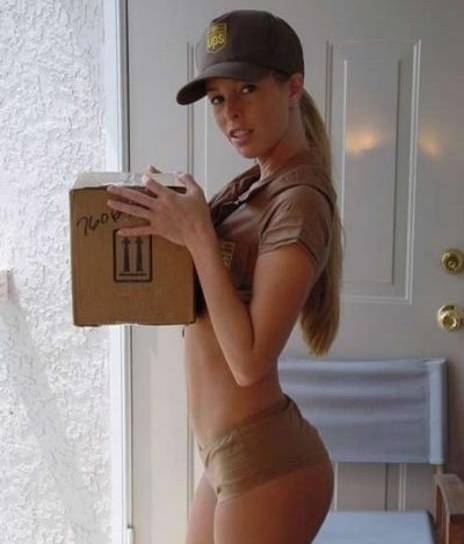
It's a wonder JoJo didn't bite her ankles !!!!!!!
You can plainly see he is pissed.
.jpg)
And now you see my dilema---my LED's are behind the windshield
---well the light on your left is----I had a brain orgasm and in
about 7 minutes just moved both light out about 2 1/2" ---and I was done.
.jpg)
Here is what they both looked like.
.jpg)
Fixed
.jpg)
.jpg)
Can you see me now.
.jpg)
.jpg)
.jpg)
I'm very happy with this adjustable height windshield---and you can have the windshield off on about 2 minutes if you want.
.jpg)
12-14-13
Single Exhaust Conversion
Here is the finished product------so why do this ?????----several
reasons.
For one you'll lose the weight of one exhaust pipe-------it is really heavy--don't
now how much---but it's heavy.
You can get rid of the catylictic converter in the left exhaust to reduce
all that heat from the muffler---and this is probably
necessary to get enough flow thru that muffler since now you only have one.
The bike to me sounds exactly the same-----no louder.
I haven't done it yet in this picture---but I'm going to put a tool tube where
the right muffler was and at least
put 2 tubes in it.
.jpg)
Here are all the parts you'll have left over.
.jpg)
So all this is not so simple---took me about 5 hours to
complete this.
First off----- to remove the cat out of the left muffler I took an air chisel
and stuck it in the inlet of the muffler and chiseled it out.
The cat is about 2 1/2" thick-----chisel out the middle and then work
the sides untill you have a big hole.
Be careful not to bury the chisel to deep at first and get it stuck.
This is what it looks like when I was done.
.jpg)
Now instead of you exhaust gases having to squeese thru
all those little holes-------it flows easily out a much bigger hole.
This is a piece of the cat---it some kind of metal material--------don't know
what---seems weird tho.
.jpg)
Here is all the cat I got out----there was a bit more around the edges you can't get to---but no need to---this give plenty of an opening.
.jpg)
I removed the wye pipe---which required removing the pipe
out of the head and removing the rear wheel..
Then I welded a plate over the end of the pipe that went to the right muffler----some
folks have put a cap on there with a muffler clamp--that's good too.
I have a little wire welder----and am a welder so I did it this way.
.jpg)
Here the wye pipe is all bolted up waiting on the muffler.
I used anti-seize on all clamp bolts----the bolts at the head pipe and the
slip joints.
.jpg)
Plastic Tool Tube Installation
12-19-13
I bought both sizes hoping to use the big one which will
hold a 1.5 litre primus bottle.
The left one holds the pictured 1 litre primus bottle.
Some hardware came with it---but I didn't use all of it.
%20(1024x768).jpg)
To put it where I wanted it and not have the bottle interfere
with my wolfman saddlebag attachment points I had to weld on
a couple flat plates to bolt the tool tube too------I use the license plate
bracket that I tool off to fabricate the pieces
and mig welded them on. My finger is pointing to the top left one.
%20(1024x768).jpg)
Sadly the big tool tube was too big---and the tire would definitely hit it.
%20(1024x768).jpg)
Finished product---and I greased the big O-ring on the screw on lid so it doesn't bind up.
%20(1024x768).jpg)
%20(1024x768).jpg)
%20(1024x768).jpg)
I don't know what I'll put in there at the moment----but it's a nice place to put stuff.
%20(1024x768).jpg)
1-2-14
It's winter----I'm bored-----so I decided
to tackle some big jobs all at once so my bike will be ready for this year
and I shouldn't have to
have to do these things for quite a while. My Safari gas tank will be here
in a few days and I stripped the bike down for that installation
and thought I might as well tackle those valves so I can ride a few years
maybe and not have to worry about them. I wasn't going to
check the valves till 20,000 miles---but this is a good time to get it out
of the way.
But--------first up--------steering head bearings. At 10,000 miles any bike should have them checked and re-greased.
.jpg)
I'm goin to change the fork oil---and put in some good ole 5weight and see how that works.
.jpg)
The steering bearings weren't damaged---but If I hadn't
done this they would have been shot before the year was out.
If you keep them greased-----you may never need to replace them.
There wasn't much grease in there from the factory-----------typical.
.jpg)
But they was some real gritty stuff in there---and they
needed cleaning badly. Looked kind of like sand.
There's a really nice seal at the top and bottom ----I think it was in there
from the factory.
.jpg)
.jpg)
.jpg)
Got ride of all this cannister stuff---and this will make checking the valves easier.
.jpg)
Here is the fuel pump----I may pull it out when I drill a hole in the stock tank for the Safari installation.
.jpg)
I got the head bearings back in with a good coating of Bel-Ray waterproof grease.
.jpg)
I'm contemplating a steering damper----I have a Scott damper
off my old KTM 520--------and if Scotts can get me a upper handlebar clamp
to mount that damper
on this bike----I'll weld on a tower where my finger is-----which will be
tricky with that oil vent line there---but I can do it.
.jpg)
I'm not going to go into step by step how to adjust the
valves---------it's already on the net already.
To get the bike to the point in the picture below involves so much and a jillion
screws---it's just too involved for me to try and
point out every step of the way.
Everybody is scared to do it---but it just isn't that bad and you don't have
to take off the rear subframe.
But you do have to loose it and tilt it back to get the gas tank to rise up
so you can get the air box off.
To get the rear subframe to drop so the gas tank rises up---loosen the bottom
2 subframe bolts, and take out the top 2.
The air box has got to come off---and so does the throttle body--I took no
wires off the throttle body---I just set it aside.
Also the exhaust pipe out of the head has to come off---leave the muffler
in place. You have to do this to get the cam chain tensioner out and
to let the rear subframe drop.
.jpg)
I had the back kind of stripped down alreay----another
1 1/2 hours I was here.
It just wasn't that bad------I studied about it for a very long time tho.
One exhaust valve is fine--------one is .002" to tight.
Both Intake valves are 004" to tight.
I don't buy shims--------I slowly and carefully sand them down till I get
the clearance I want.
Buying shims usually just get you close.
The throttle body has to come off too and the valve cover slips to the rear
right over where the throttle body was.
The cam chain tensioner has to come out before pulling the cams.
Be sure the cam chain doesn't jump on the bottom sprocket-----mine did and
I had to re-time the cams---which was easy.
If you miss that you will bend all your valves.
Torque on valve cover and cam carrier bracket bolts is 10nm.
Piece of cake.
.jpg)
The tools I used to sand the shim and measure them.
I figured out how much thinner the shims needed to be and sanded them down.
I always take clearances to the maximum recommended.
I used a micrometer to measure them.
Recomended specs are Intake .009"-.011" I took mine to .011"
Exhaust .015"--.016" I took them to .016"
Actually one exhaust was .017" and I left it alone.
.jpg)
Safari Tank Installation
The shipping information plainly stated 2 packages---so
when only one arrive I was worried.
Everything was in the one box----including the hardware.
The 6.6 gallon Acerbis tank that goes on my KTM 45EXC is also pictured below.
%20(1024x760).jpg)
%20(1024x768).jpg)
Skinny little booger aren't they.
%20(1024x768).jpg)
Each tank has it's own petcock.
%20(1024x768).jpg)
Here is where I tapped into the bikes stock gas tank.
A lot of people don't like this and they way it was done as it's just a push
in insert---with no fastener on the inside.
However----after installing it and feeling just how tight a fit this was I
am totally happy with it and am not worried at all.
What you can't see is---the pipe that inserted thru the rubber groomet had
a pretty big barb on the end of it that will
make it extremely hard to pull out--------it's not just a straight smooth
pipe----kind of like whats on any petcock.
It is inside the frame---and the gas line immediately tucks inside the frame
also-----good job Safari.
This is not the bottom of the stock tank by the way. The bottom of the tank
is another 6" lower---approx.
I didn't get a picture of it----but just beyond this tap
there is also a main valve that will isolated both Safari's from the stock
tank.
So if you had a problem with the Safari's you can still run on the stock tank.
%20(1024x768).jpg)
You don't have to remove the fuel pump to drill the hole
in the stock tank but I did.
That way I was able to siphon all the gas out of the tank and reach in and
remove any debri that might have gotten in there.
The hole you drill must be exactly 1/2".
%20(1024x768).jpg)
This picture is lookng straight down into the tank from
the top------at the bottom center of the picture you can see the
pipe and rubber grommet sticking thru the side of the tank.
There was very little debris inside the tank-----most from the factory---but
I removed all of it.
So you can see the bottom of the tank is way lower than where you tap in--which
is fine.
The new Safaris will empty completely before the stock tank does.
%20(1024x768).jpg)
I love this bracket-----the are going to support the front
bottom of the Safari's very well.
You can see the fuel lines that will go to the Safari petcocks.
It is stainless steel and this is very well made and thought out.
%20(1024x768).jpg)
Sadly--my left tank still hit some other places. I found
where it was hitting---marked the spots with a marker.
Warmed the spots up one at a time slowly and carefully with a heat gun and
pushed the plastic in with the wooden handle
of a hammer about 3/8" until it cooled. I didn't have to heat the places
marked "steel brackets" and "Shroud Bracket".
I think the place marked Shroud Bracket was where it hit the top of the radiator---and
I just cut that piece of plastic off.
%20(1024x768).jpg)
The left Safari was hitting the stock gas tank here.
%20(1024x768).jpg)
I cut these brackets off that held the stock tank shrouds---they might have hit the new Safari's and I don't need these brackets any longer.
%20(1024x768).jpg)
Ditto---this was a bracket that use to hold the side panel----I don't need this bracket anymore.
%20(1024x768).jpg)
And Ditto--I cut that plastic off where my finger is pointing.
The picture was taken before I cut it.
You don't need this.
%20(1024x768).jpg)
The top bracket was not going to bolt up till I modified the bike brackets and the left tank itself.
%20(1024x768).jpg)
%20(1024x768).jpg)
I did have to relocate these holes just a bit------easy peezy.
%20(1024x768).jpg)
As you can see---the stock acces to the tee to drain the
frame oil tank is maybe impossible to get to.
But-----I had already extended my drain line down with the valve on the bottom
of the line----easily accesed.
If you installed a drain valve up high right at the tee----you need to move
it down like I did so you can get to it easily.
%20(1024x768).jpg)
And the really cool part about these tanks is that they
totally protect the raditor----I love this !!!!!!
They extend about 2 1/2" in front of the radiator----so if you slide
down the road you aren't going to damage your radiator.
%20(1280x960).jpg)
You can see the 3rd shut off valve in this picture----it
just below the bottom center of the tank.
This system has 3 valves----------one at each tank---and this one.
%20(1280x960).jpg)
%20(1280x960).jpg)
I ran both both Safari gas tank vents to this location-----per
Safari instructions.
And I ran the stock gas tank vent in here to.
I think later on I'm going to put a couple of those shorty gas tank vent thingy's
on the Safari's and eliminate the vent hose going to the steering stem.
This stainless top bracket hold the top of the tanks very securely---this tank is very well secured and doesn't move at all.
%20(1280x960).jpg)
I filled this bad boy up and marked each gallon as I filled
it.
I'm not sure I waited long enough at times for all 3 tanks to equalize---looks
funny to me--I had the gas caps off.
%20(1024x768).jpg)
The eight gallon mark I put here.
%20(1024x768).jpg)
All three tanks will hold about 9 gallons.
I already had exactly 2 gallons in the bike before I topped it off at the
gas station--and I could have put a bit more---so 9 gallons it is.
%20(1024x768).jpg)
%20(1024x768).jpg)
%20(1024x811).jpg)
%20(1024x768).jpg)
%20(1024x991).jpg)
%20(1024x737).jpg)
%20(1024x768).jpg)
%20(953x1024).jpg)
%20(1024x768).jpg)
%20(1024x768).jpg)
Tower Rock in Missouri---Across the Mississippi River West of Grand Tower, Illinois
%20(1024x768).jpg)
I've go so many picture
on here---the rest is on the
next page.