My 2014 KTM 690 Enduro Build
Last Updated 8-26-18
19,000 Miles
Ok-------at the mileage above my 690 blew
up.
Well, it was going to --rods, crankshaft bearings and counter balancer
bearings all shot-----------I'm still pissed----went out and bought a 250
Honda !!!
Purchased March, 2014
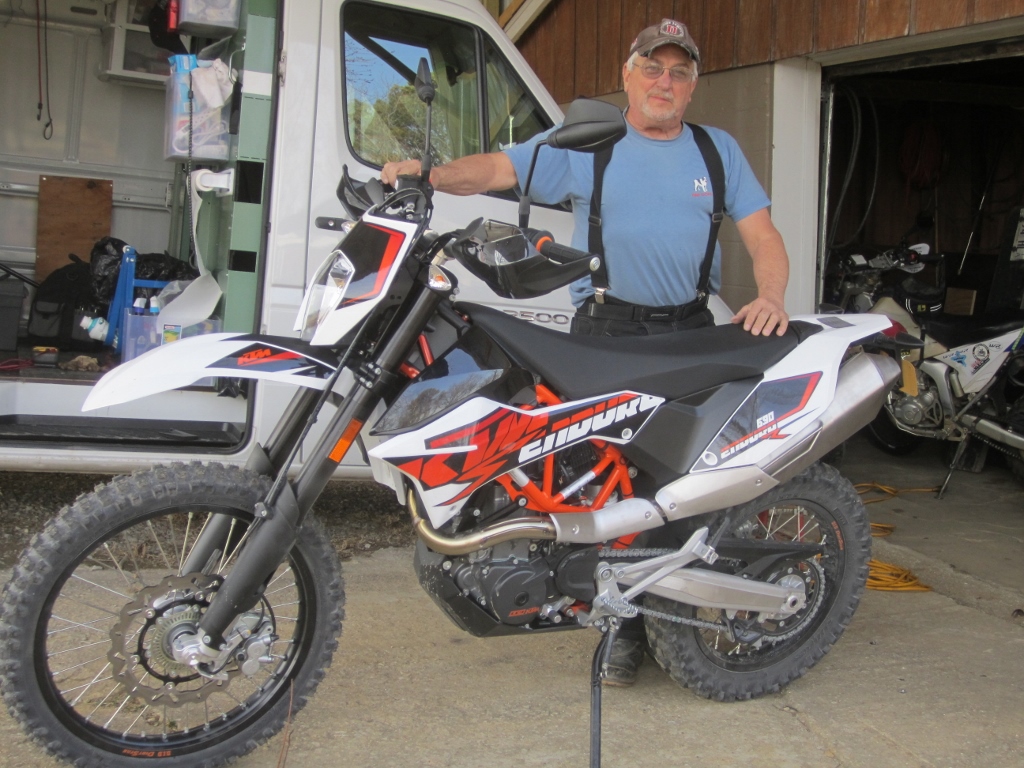
The latest picture of it----2016
.jpg)
I always put a steering damper on any bike I own.
I sure saved a lot of money here as I already had the damper that I had taken
off my 520 KTM EXC when I sold it and
the sub mount off of it even fit---------so all I need is the tower part--which
I've gotten order and is not in this picture.
.jpg)
This is exactly the same (almost) as my old 950 KTM----there
are 2 unused circuits ----ACC1 and ACC2 which can be tapped in for electrical
goodies.
These circuits are supplied by fuses #7 and #8 under the seat in the fuse
box. Number 7 fuse is the one that is hot all the time.
One is hot all the time and will power my gps---the other is only hot when
you tuen on the ignition and it will power my heated grips and my Mondo Moto
LED lites.
Here you can see I have alread tied into the two circuits and made it nice
and tidy with heat shrink tube.
.jpg)
These circuits have their own fuse and are numbers 7 & 8 in the fuse box. I've pulled both fuses (right where my finger is pointing) while I was doing the wiring.
.jpg)
This plug and wire goes straight to the battery---with
a fuse of course at the battery.
This will power my heated clothing and my chargeable stuff I carry ---such
as my cellphone.
I'll also use it to charge the battery if I need to-----I've have these plugs
on all my bikes and an adaptor made up for my battery charger.
.jpg)
I only use "Hot Grip" brand heated grips------I
don't like any of the others.
I love the fact that the grip is much, much fatter and you just wouldn't believe
how much easier it is to grip the bars with a fatter grip.
Cuts down on fatique on a long ride just as a steering damper does.
.jpg)
I had never had any HDB (Highway Dirt Bike) handguards
but always wanted a set because they looked
real beefy and had a neat top handlebar clamp that they attach too and it
also has places to put swithches
and lites---and power plugs.
There was a good size tap in the kit and I couldn't for
the life of me figure out what it was for ???
There were no instuctions (not that I would have read them anyway)------but
I figured it out.
How clever is this??? Is this what I was suppose to do ? Or was that tap for
the engine block of
as 53 Chevy ???
But as you can see----after tapping--you insert the insert and that is what your handguards bolt in to----nice !!!!
.jpg)
Top Clamp----the handguards bolt to the front and you have
all kinds of holes for---------stuff.
I just have one rubber water proof switch in there which I bought from HDB
and it will turn my heated grips on.
I wired them into an unused circuit behind the headlight (fuse #8) that was
only hot when the ignition was on.
.jpg)
Next I installed some Mondo Moto auxilliary lights----I
made a short bracket and mounted them to the same bracket
the turn signals were mounted to. This worked out great and was really easy
and quick.
I slottled the bracket on the bottom so it would slide behind the nut that
holds the turn signal on without disconnecting the turn signal wire.
These are awesome and make you very visible---and make daylight out of dark
at night.
And in broad daylight they do not bother oncoming traffic---but they will
see you.
At night you have to turn them off to oncoming traffic------they are many
times brighter than the headlight
and draw very few watts--way less than the stock low beam.
.jpg)
I wanted the switch to contro the Modo Moto LED lites very
handy---for riding in traffic.
I almost mounted that switch on the HDB handlebar clamp--that would have been
very un-handy.
.jpg)
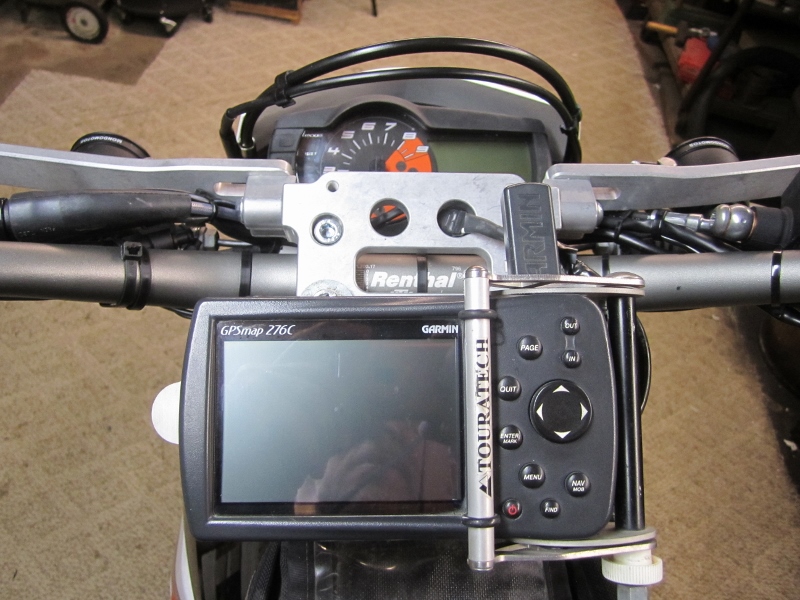
This may or may not be the permanent place I put my gps.
You can't see it in the picture---but I found and old tubing mount I made
for my old KTM520 and
it's bolted to the HDM top clamp using the lower two bolts.
I can mount my 276C or 60CSX gps to this mount.
I'll probably put a set of Double Take Mirrors on this bike---I have an extra set.
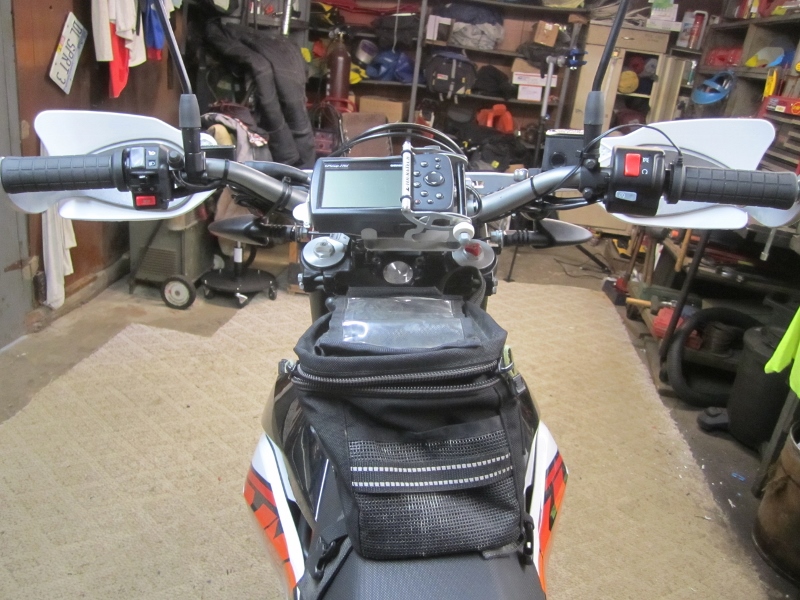
I purchased a handlebar crossbar from Touratech and will
not only mount my gps to it----but will put a rollchart on here.
I can mount my Garmin 60CSX or 276C on here with the touratech stainless gps
mounts.
Mounting the crossbar was a bit fiddly---and I had to grind on the clamps
a bit on the right side so it would squeeze in between
the handlebars and the brake master cylinder.
.jpg)
.jpg)
Luggage ???
I'm a huge fan of Wolfman products and have 2 pairs of expedition saddlebags
that I'll eventually mount one of them on this bike.
Wolfman use to make expedition racks for this bike---or I should say he had
someone make them and he is no longer doing that.
But.............I called him and he is just selling off all his parts and
he sold me everything I need to mount my expeditions to this bike.
It was the last he had---no use hollering at him for another---it's all he
had.
I will have to just do the welding and painting---but I was tickled to death
to get these parts.
So the parts came in----also a Wolfman tailrack which works
together with the wolfman side racks.
All I got were a bunch of parts----I had to figure it all out and weld it
all up. Here is the left one all done.
.jpg)
Mounted Up--fits perfect---I'm really proud of my work.
.jpg)
The good part about all this not really related to just
using the wolfman luggage.
All of this helps to support the subfram (the gas tank) a lot, lot better.
I think this makes the whole tail 3 times stronger---it triangulates the support.
.jpg)
.jpg)
.jpg)
.jpg)
I'm not as good a welder as Mr. Berg who originally made these completed racks for sale---but damn near !!!!!
.jpg)
Super nice rack---I got it from Revzilla-----not cheap.
So--off to the powder coater-----a good friend of mine right in my hometown owns the shop--how handy is that !!!!
.jpg)
Got them back from the powder coater----he done a great job.
%20(800x600).jpg)
%20(800x600).jpg)
%20(800x600).jpg)
%20(800x600).jpg)
%20(800x600).jpg)
%20(800x600).jpg)
Update 5-23-14
I put a couple thousand miles on the 690 out in Utah---rode some real tuff
stuff at times.
The bike was flawless on the ride---ran out of gas once tho.
I was a happy camper.
Crossed the Dirty Devil River on Poison Spring Wash road.
%20(1024x768).jpg)
On that ride---I rode East across Utah--then back a different
way
carrying camping and cooking gear. Everything held up fine.
%20(1024x473).jpg)
%20(1024x768).jpg)
5-30-14
CJ Designs gas cap install
Here's what you get----aluminum billet flange--gas cap---3 screws and vent
fitting.
.jpg)
First you tighten the brass vent fitting into the billet flange. It has an
o-ring.
It was a stretch to get the stock vent hose over it---but with some grease
I finally got it on there.
.jpg)
Remove old gas cap by removing the 3 screws---there was
all kinds of dirt and sand waiting to fall into my gas tank.
The only way I saw to get rid of it down in the recess was to use a vaccuum.
Don't suck gas out of the tank into your vacuum---ka-blewy !!!!!
I anti-seized those screws---don't want them locking up in those brass inserts
in your plastic tank.
.jpg)
The gas cap vent came plugged---leave it that way---as
the tank vents thru the side---just as it did stock.
If for some reason down the road you want to vent it out the cap-------you
can by pulling the vent cap off the gas cap.
There are some really great advantages to this---the first being you don't
need a key anymore to put gas in it.
All you city slickers are so afraid of someone stealing gas out of your bike-------it
will never happen---forget about it.
You are wasting your time and weating out your key.
Now you don't have to pull that whole triangle piece out of there---this is
going to be so much easier.
And----no dirt is going to drop into your tank when you fill up like can happen
with the stock gas cap.
.jpg)
Now that I don't have to pull that triangle piece out of
there---I think I can fuel without removing my luggage.
Even with my Wolfman expedition duffel on there.
About $135---I bought it from Rocky Mountain ATV.
I'm a happy camper.
.jpg)
6-4-14
Installed a new Tractionator Intermediate Terrain Rear
Tire
It was hard to put on--hope I like it.
.jpg)
.jpg)
7-16-14
Spark Plug Fiasco
Guess what ????
Your sparkplugs are way down in there. KTM really screwed up here----the inner
portions of these plastic tubes is
too small to allow the sparkplug wrench to go all the way down on the sparkplugs.
You can't get the sparkplugs out. But I fixed all this---so read on.
.jpg)
Don't be scared---take the 2 bolts out holding these tubes
in the head and use a screwdriver to pry the tubes out.
They are just inserted into the head and seal with simple O-rings-----just
pry the tubes out.
.jpg)
See here----the sparkplug wrench has to to all the way thru the tube to get on to the plugs---and it won't----by a long shot.
.jpg)
So--easy fix---just ream the tubes out---the one on the
right has been done.
You just need to ream the last inch or so--not the whole tube thank god.
.jpg)
Now the sparkplug wrench will go all the way to the bottom----which it needs to to fully engage the sparkplug.
.jpg)
Here is what the head looks like with the tubes out.
.jpg)
Here's what the plugs look like----I've never seen any
with this long of threads.
The plugs are completely different from each other.
.jpg)
Rally Raid EVO2 Gas Tank Installation.
I'm not going thru the step by step install----it is too
intense and is available on the net from Rally Raid.
Can't believe I paid $1,400 for these gas tanks------but I did---ouch.
Got my Rally Raid EVO2 gas tanks and started the install---and
adjusted the valves to their widest specification .13mm or .005"
All four were about .004" when I checked them.
.jpg)
After the install I was able to put 5.6 gallons of fuel
into all 3 gas tanks.
I don't see being able to use it all as the petcocks and fuel line go up from
the bottom of the tank ?????
.jpg)
Something sexy about having 3 gas caps.
.jpg)
I adjusted the valves to their widest specification .13mm
or .005"
All four were about .004" when I checked them. Spec is 0.07-0.13mm or
.003"---.005"
I didn't have to adjust them---but did while I had a lot of parts off the
bike.
At 2,000 miles the valves have settled in ---and since I adjusted them to
their widest spec----I won't
check them again till at least 10,000 miles.
I'm not going into the exact procedure----those instructions are all over
the internet.
Wolfman Panniers
7-31-14
Turns out the wolfman panniers that I've used a lot on my KLR and WR250R work
really well with the
690 and the EVO2 tanks-----wouldn't have worked at all with the stock tanks
and side panels I don't think.
They are way more forward than on my WR and my knees just barely touch them.
I luv using these---so handy place to pack some lite stuff that wouldn't get
destroyed if it got damp.
.jpg)
.jpg)
10-6-14
Installed KTM touring windshield.
Took about 20 minutes---I think about $60 from KTM Twins
.jpg)
.jpg)
.jpg)
This is the ABS Dongle.
Instead of just 2 modes of ABS------"on or off"-------I now have
3.
On, Off---and Offroad ABS, which is front ABS only.
Now when I start my bike it's already in front ABS only mode.
It's a 5 minute install------15 if you've never done it before (me).
Front ABS mode makes sense.
1. When do you want to slide your rear wheel ??? ----lot's of times.
2. When do you want your front wheel to lock up ????.........NEVER.
.jpg)
5-14-15
Today I installed a MRA-X-creen sport add
on windshield spoiler blade---smoke gray.
I got if from Twisted Throttle for about $120.
Looks like it added about 4" of height to the KTM hard parts 690 windshield.
.jpg)
If you buy this externsion---be aware it was a very tedious
install that was very frustrating for several reasons.
I was barely do-able as it is made for a windshield a bit wider---but I'm
happy with the finished product.
It has adjustable arms so can be tilted to any angle.
Do not use the template that comes with
the kit for drilling the holes.
This windshield is too narrow for that to work.
.jpg)
Mine as ordered came with two mounting options------a clamp
on and a bolt on. The 690 windshield is too narrow for the clamp on.
I used the bolt on items---and had to bend the windshield in just a bit to
get it to fit----that was not a problem at all.
Keep in mind---this was not made specifically for the 690---but I would call
it a universal fit item.
.jpg)
Probably the best picture of it.
The instructions were the worse of any product I ever bought----they sent
2 allen wrenches---but should have sent 3---and another for the torx screw
that was the tiniest thing I ever saw----nobody has a wrench to fit it. Looks
like it came out of a pocket watch !!!! I can't use it--and will have to find
an alternate screw. But---I got it done---if you don't have a lot of patience
you might forget this accessory.
Looks simple----it's not.
.jpg)
6-19-15
About 7,000 miles
Installed Wings exhaust
Here's what you get----left to right---frame
mounting clamp--lube for rubber on mounting clamp----connector pipe and
the DB (Decible) Killer (it's inside the connector pipe in the picture. It
was about $425 shipped to my house from Slovenia, Germany ????
How come it took 3 days to ship from there to my house in the USA---and it
takes a week to ship someting UPS
in my own country ???????
%20(1024x512).jpg)
Stock pipe weighed 10.6 lbs. on my bathroom scales.
%20(800x600).jpg)
Wings exhaust weighted 5.4 lbs.
%20(800x600).jpg)
Very easy straight forward install-------It didn't come
with any directions but you really don't need any.
I haven't put the decible killer in yet-------it really has a bark---I don't
think I'll like that and will put the
DB killer in. Also-----------it required no re-mapping of the FI with the
DB killer in I was told.
It doesn't bark till you nail the throttle---but when you do it really barks.
%20(1024x768).jpg)
I didn't have to remove anything to install it----------looking
at it I thought I would ------but I didn't.
Took about a 1/2 hour to install---only because it's hard to start a bolt
thru the muffler clamp.
DB killer takes only one minute to install.
%20(1024x768).jpg)
I was surprised to see this in the box------nice !!!!
%20(1024x768).jpg)
I replaced the stock air filter today 8-19-15
The stock one is not re-useable and seems to pass some dust.
So------on the recommendation of a buddy I bought this one from KTM Twins--pretty
expensive at about $90.
It comes pre-oiled so just stick it in------to do that I had to take a razor
knife and trim the opening in the airbox as KTM
got quite sloppy with their plastic molding. It requires a special cleaning
and oiling kit to service it.
Really weird---on the box it said it needs servicing every 25,000 KM ??????
That's a lot of miles ??
Here's the old and new side beside.
The filter part looks exactly like K&N stuff to me.
I greased the under side with Bel-Ray waterproof grease.
This filter is way stiffer than the flimsy stock one.
.jpg)
3-28-16
Installation of Golan Mini -----10 Micron Fuel Filter
These bikes have been know to have the fuel injector get
plugged-----I wanted to avoid this happening.
Dealing with a plugged injector is something I did not want to have to deal
with while out riding the bike.
I wanted the filter to be accesible without removing the air box or my aftermarket
gas tanks.
So---after removing my EVO gas tanks and the air box I was able to get to
the stock fuel line going into the injector.
The air box has 4 bolts holding it to the frame---take them out--unplugged
the sensor in the side of the air box----remove
the rubber hose off the bottom of the air box---and finally loosen the clamp
on the throttle body----there are two---just loosen
the one closest to the throttle body.
In this picture you can see my finger pointing at something-------that
is where the fuel line from the fuel pump used to go (the injector).
I disconnected it----and ran a new line from the original quick disconnect
and routed it down the frame on the right side.
The right part (aluminum looking thing) on the quick disconnect has a 20 micron
filter in it------I took it out.
My new 10 micron filter will take care of any debris----and I won't have to
take things apart to take care of a plugged filter.
The Golan is re-usable and cleanable.
%20(1024x768).jpg)
Here you can see the line (on top) I was just talking about---and
the new line I ran from the golan filter into the injector.
Do not use the old traditional worm type fuel clamps---they are not made for
pressurized fuel injection systems.
Use one that has a bolt in it. Available anywhere. The hose is 5/16"
I.D.
%20(1024x768).jpg)
My bike is a 2014 and has the EVO 2 tanks so here is where
I had to mount the golan filter.
If you don't have those tanks you job is much easier and you find a better
place to put the filter and it will be easier to get to.
The flow of fuel is up thru the filter---the line on the bottom comes straight
from the fuel pump---and the line on the top goes
right to the injector----------easy peezy.
The Goler just unscrews for cleaning---eezy peezy.
%20(1024x768).jpg)
Getting ready to mount up my EVO2 gas tanks.
%20(1024x768).jpg)
All done !!!!!
The horizontal fuel quick disconnect is the gravity feed line from my EVO2
gas tanks to the bottom of the stock tank.
It may not look like it ----------but all this is tucked away behind my gas
tank and saddlebag mounts.
Nothing is going to get to these items without ripping my leg off first.
%20(1024x768).jpg)
3-4-17
About 12,000 miles
Installed a Rekluse Adventure EXP 3.0 Clutch
The one thick plate from them comes with 3 different spring options.
I used the "lighter" springs which provides clutch lock up at a
lower RPM.
I think this was 3 blue and 3 red springs.
This is a $900 deal----ouch-----I like it !!
8-7-17
15,000 Miles
Replaced the rocker arms, adjusted valves (didn't really
need it).
My old rockers were just as good as the new ones I bought.
Some people have had them break and ruin the motor---didn't want to but I
replaced them.
I'll feel better on a long ride now--the new ones have a different number--maybe
they won't break ever ?????
Just did 1,800 miles in Montana, Idaho and Wyoming on it and it performed flawlessly.
%20(1024x599).jpg)
Over 18,000 miles now.
I modified the wolfman racks to easily mount my Mosko Moto
BC35 saddlebags.
And have done a couple trips using them. See my Mid-Atlantic Back Country
Discovery ride.
The 690 is gone now ---not long after 18,000 miles it was
rattling so bad I knew it was going to blow.
Sold it for nothing---the buyer took it apart and yes it was going to blow.
Crank, rod and countershaft bearings were all shot.
Man was I dissapointed in this bike-------loved it till then tho.