Continued 2013 Husky TR650
This is page 2
GPR Steering Stabilizer Install
About $500 from GPR
Here is the finished product.
It goes under the bars and this install will raise your handlebars 1/2"
My bars are stock---but when you order the kit you can order it to fit fat
bars.
This is not a 1 hour install.
It took me about 3 hours-----However a lot of this dissassembly I had done
before.
If you are going to grease your head bearings now-----plan to spend all day.
%20(1024x768).jpg)
Here's everything you get in the bubble pack.
After installing this thing I have to give GPR a thumbs up----it was pure
genius how they designed and fabricated that lower black bracket.
I could have never figured that out. And I'm really surprised it doesn't cost
more than it does to be honest.
%20(1280x960).jpg)
And here it is all laid out.
As you can see you replace your stock handlebar risers completely and this
will raise you handlebars 12"---I think most
everybody will be happy with that----no mods to any wiring or cable is needed.
The black part on the lower left has to go around your steering stem---this
makes you remove your top triple tree.
Once the tree is remove this slips down over the steering stem and you tighten
it with a pinch bolt.
%20(1280x960).jpg)
It would be very silly for you to not grease your steering
bearings at this point if you haven't yet------very foolish--as you'll have
to take all this apart again.
While the upper tree is removed you need to fasten the new bar risers with
bolts from the bottom of the tree as seen in this picture.
You need to do this before you mount the tree back--you cannot do this with
the tree installed.
%20(1024x768).jpg)
Here is the tower bracket---be sure and tighten the pinch
bolt before going any farther.
When pushing this bracket down onto the steering stem you need to push it
down all the way as far as it will go.
I did all this without pullng the fork legs out of the lower triple tree.
Also you need to get the complete headlight housing pushed forward to get
the upper tree off.
One bolt on top and 2 screws under the front fender will alow you to push
it up and forward out of the way.
%20(1280x960).jpg)
Here's a good pic with the upper triple tree installed back.
%20(1280x960).jpg)
Almost done--going back together.
I didn't have to worry about adjusting the head bearings as I had lubed my
steering head bearing long ago and didn't remove that adjuster nut.
If you lubed your steering bearings while doing this install you would have
to adjust them again before getting to this point.
See the white pointer ??? It is pointing at the number 1 which is the lowest
setting----8 is the highest.
You can go straight from 1 to 8. I don't recommend that----------8 is probably
way to high for any type of riding.
%20(1024x768).jpg)
The stabilizer arm is a tight fit in the lower black bracket.
Other dampers I've had this is a loose fit. I don't guess
I see anything wrong with this. There is a pinch bolt to tighten the stabilizer
arm up in the lower bracket. It seems to me they may want you to snug it up
???
%20(1024x768).jpg)
I hate it when I have parts left over---------especially 6 parts. It's OK !!!!!!!!!!!
%20(1024x768).jpg)
When I got done--my handlebars would no longer turn as
far as they use too---and I discovered the bottom corners of the damper were
hitting
the top of the black bracket---barely. If you have this problem be careful
and don't force the bars---you may break something.
I ground off the tiniest bit of aluminum off the top of the black bracket
and solved that quickly.
All done---go riding.
If you have no damper experience be very careful. Start at one and play with
the settings for different terrain.
If you take off for your first ride with the dampener set on high (8)-------I
bet you will crash.
The kickstand is way too short---why have I waited so long
to extend it ????
I think I extended it about 2 1/4" and used my little handy dandy mig
welder.
The outside diameter of the kickstand is 7/8"---guess what else is the
same--any dirt bike rider should know this ???
Your handlebars !!!! I found an old set of handlebars I had laying around
and cut a piece out of it to extend it.
I changed the angle a bit too as you see-----worked out perfect. I used the
original foot.
The stock kickstand is very thick--unlike the kickstand on my EXC which lasted
about 15 minutes before it broke off.
.jpg)
Wolfman "Blackhawk" Tankbag
3-16-14
I've bought many Woflman "Enduro" tankbags over
the years and they have been great--and put one on this bike.
But---this bike is a little bigger than my smaller "offroad" adventure
bikes and I wanted a tank bag------just a little bit bigger.
The Black Hawk looks just like the enduro and is functionally the same--but
is a bit bigger---just what I wanted.
I think it would be fine on a Terra with the stock tank---but as you can see
it works well with my Safari equiped Terra.
You'll need to order the rain cover when you order if you want it to be 100%
waterproof.
These are available HERE
.jpg)
Without the rain cover they are about $130
The Blackhawk holds 8 litres---the enduro holds 6
.jpg)
.jpg)
Update 5-23-14
I've been puttin' the miles on this bike---no problems whatsoever---if
you don't count flat tires.
.jpg)
6-2-14
Pod Mod
What this envolves is moving the air filter
to the top of the throttle body-----eliminting the stock air filter----which
I think in 100% of these bikes
allows dirt in. From a couple places---what I am not going
to do is
provide a step by step procedure for this--------this info is all over the
internet and very involved--including what parts you'll need for this work.
What you see below is the end result. I used a hot knife to cut out the top
of the air box---without removing the air box and installed these
parts and filter you see. Now I can clean my air filter here and there is
no way dirt can get to my motor by way of the air intake.
.jpg)
I bolted the part of the air box I cut out (used a hot
knife for cutting)---and sealed the joint with gorrila tape--which keeps the
intake noise down to the stock level.
.jpg)
All done and waiting for me to put the seat back on.
I relished in the fact that I will never have to pull the stock air filter
door off ever again. I don't hate many things ----but hated that
air box door the first time I took it off.
.jpg)
August 8th, 2014
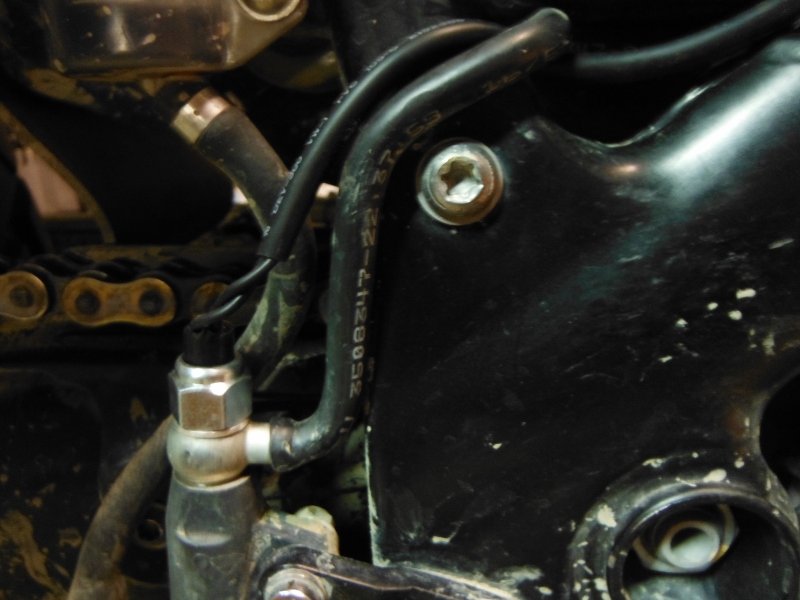
Hydraulic Brake Switch
I never did like the brake switch on this bike---it is
mechanical and is very vulnerable to damage or getting stuck from mud build
up.
So I installed a hydraulic switch from Rocky Mountain ATV---it was about $18
I think--and took about an hour to install and wire in.
Here is a link to buy it
HERE
It merely replaces the banjo bolt on top of the rear brake master cylinder.
9-25-14
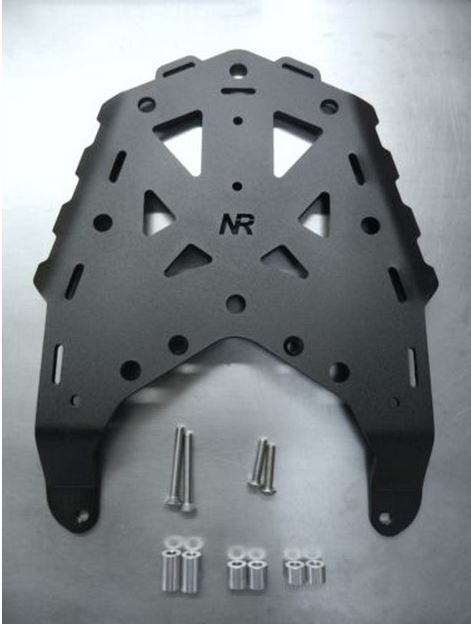
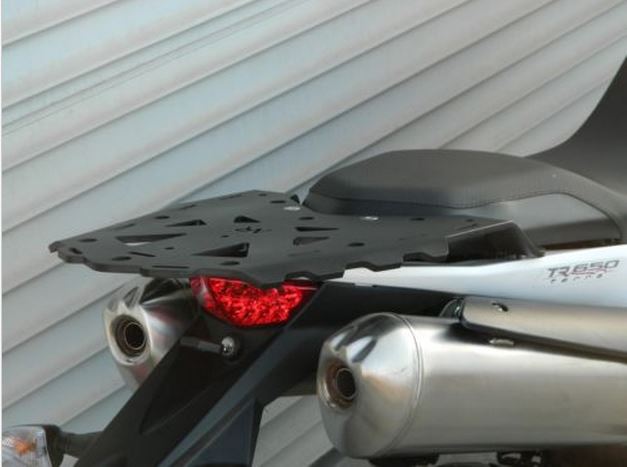
About 17,000 miles ????
Threw away stock rack and installed this nice aluminum rack
from Nomadic.
Actually got it on E-bay for $99 plus shipping---a 10 minute install.
These are not my pictures nor my bike-----but same thing.
Back to page 1 of My Husky Build
Back to my Homepage